Thursday 20 June 2013

Amazing crystals ready to go.

Over the last few weeks I have been spending my time working on a crystals unit for students in Year 5 in Australia and Year 6 in the USA. The difference in grade being of course to the relative curriculums.
This program was one I ran with year 5 and 6 students a couple of years ago and definately one my students enjoyed. At that time however I tried to have some success with Epsom and salt crystal growth, but we just couldn't get the crystals to grow and in fact we couldn't even grow salt crystal seeds despite trying various methods - no joy.

The greatest success we have had are with Alum and Copper Sulfate which are truly beautiful crystals and very easy for students to grow.


As you can image the students all wanted to have the opportunity to grow Copper Sulfate crystals. Copper sulfate is available in the gardening section of hardware stores. In Australia, it is available in Bunnings relatively inexpensively. 


The Amazing Crystals introduces students to crystals, where and how they grow and provides some really nice pictures of examples. It is always nice however to have the real thing to hold and you will often find students have collected some crystals at home that they may be willing to bring in. In Australia we have a Scientists in Schools program which provides the opportunity for different specialists to come and share their expertise in your classroom. I invited a geologist to come and provide a detail of knowledge well beyond my capabilities. The students really enjoyed his coompany and the amazing resources he was able to access.

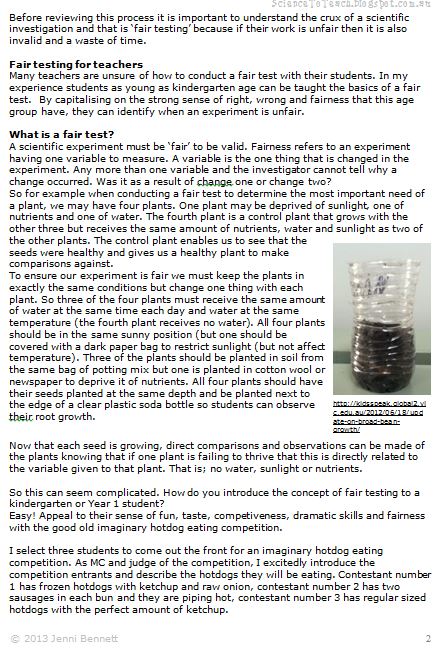
In the unit, I outline how crystals form on a molecular level and provide opportunities for students to comprehend the information using drama. There is a procedural outline for growing crystal seeds (the base of growing a good healthy sized crystal) and then for applying this knowledge to grow a variety of crystals.

Students are then given the opportunity to create their own investigation into growing crystals. To reinforce knowledge I have made some posters to use and to aid in assessment there is a suggested assessment for each of the 9 activities described in the unit.
I feel that this is a comprehensive unit and I really hope others enjoy teaching this unit as much as I did.
The crystals make a great science fair project also.
The unit available in a few of my stores including Teachers Pay Teachers and Teacher's Notebook. More stores to come and the Australian version is also close to completion.


http://www.teachersnotebook.com/product/Jennidb/amazing-crystals-a-year-6-investigation 


Sunday 9 June 2013

Finding a new way

It has been a few weeks since I have written a post and it is part due to a distraction I have had with researching information on students with special needs. Having had some recent experiences with teaching students with a variety of ailments I spent some time looking at the rates and what may be causing the increased rates of sickness among our students. My more recent teaching experiences with students with special needs are however with those born into homes that have caused them to develop a disorder. Quite sad.
I am also interested in many of the professional development opportunities I have been discovering through reading a variety of American teaching websites and teaching support sites. Sites such as the Teaching Channel: https://www.teachingchannel.org/?national=1 which has short videos, blogs and a Q&A forum for seeking assistance on a particular issue.

The videos are made in classrooms, feature classroom teachers and their students and provide real examples of the implementation of the concepts being demonstrated. I have found the videos thought provoking and with concepts that are truly adaptable to a variety of classroom scenarios and ages.

Another site I have enjoyed learning from of late is http://www.teachthought.com/ The short articles present useful, practical and realistic information on a variety of topics. I am enjoying discovering ways of implementing best practice teaching methods and alternative ways of setting up classrooms and the dynamics this creates.

It is well worth your readers while to have a look at these and I would really appreciate others sharing their favourite cutting edge teaching methodology websites with me.


Wednesday 22 May 2013

Rube Goldberg and simple and compound machines

It's been quite an effort and a learning curve to say the least, but I have finally finished the Simple and Compound Machines Unit that I have been working on. 

I recall teaching this unit with my Stage 2 students a few years ago and actually incorporated it with the work of Rube Goldberg. We (my students and I) thought his work was really fun and interesting and it certainly sparked a light of imagination in the eyes of my students. 

Many of us would have seen adverts on television that used Rube Goldberg machines, which in a nutshell are machines that intentionally take a large number of steps to complete a simple task, such as turning off a lightbulb in 20 steps. Simple machines are connected to one another to complete the task. It's fun to watch, but as my students discovered, it is painstaking to create a rube goldberg machine and have it work repeatedly.


As you can see from these Rube Goldberg machines made by university students.There is no reason though why younger children can't make them and in fact the youngest students I had doing it were in year 3. When looking at these machines in actions though it is clear they are made up of a range of simple machines working together.These videos are a great precursor or final display at the end of the simple and compound machines unit I have just finished.The unit is suitable for students in years 3-5, but in the Australian version, it is aligned with the year 4 science curriculum elaborations.This is one of the biggest unit's I have written and I am so proud of how comprehensive it is. 

It includes:


  • A teacher’s guide with thorough explanations of concepts included,
  • Assessment for each of the activities included,
  • Comprehensive extension work for three of the activities to extend students laterally, 
  • Full activity descriptions,
  • 6 x Bright and fun simple machines posters
  • Assessment worksheets
  • Extension worksheets
  • Investigating scientifically and design and make student reference guide
  • Testing simple machines worksheets for practical activities,
  • Extensions worksheets
  • Simple machine activity stations cards to laminate
  • Design and make planning pages
  • Simple and compound machines PowerPoint presentation.


If all elements of this unit are taught it could take a year 4 class approximately 8 weeks. Otherwise it can be broken down and used as smaller resources.

Students will love undertaking the acitivities and I can't wait to teach it to my students in the future.


It's available now in USA and Australian versions in my TpT store and on Teacher's Marketplace.


Please let me know what you think of it.


Wednesday 15 May 2013

What are simple and compound machines?

If you follow me on facebook you would have seen my link to an awesome website I love to use with my students called EdHeads. The site is http://www.edheads.org. I have used their simple machines interactive activities with students in years 3 and 4 a few times. Apart from the general layout, graphics and age appropriateness of the activities I really like that the students can't move on until they have completed the questions and demonstrated a level of comprehension.


So why the reference to Edheads?

I have been working hard on a unit on simple and compound machines for students in year 3 and 4. 
So what are simple and compound machines?
There are six common simple machines: lever, pulley, inclined plane, wheel and axle, screw and wedge. Essentially they all make life easier in one way or another. It could be that they make it easier to move a load, requiring less effort or force or that they connect or seperate two things.

A broom is a lever. The fulcrum or pivot point is the user's wrist. It moves a load (the dirt) with the load arm and is pushed with the force arm (where we hold it).

Compound machines are objects that have two or more simple machines included in them. A pair of scissors is a great compound machine. 


It has a lever (the handle) and a wedge (the blades of the scissors). A more complex compound machine is a stapler and staples.


A stapler has a lever - the handle, a wedge - the staples a wheel and axle - the pivot point for the lever and an inclined plane - the slant for papers to slide up under the staple dispenser. 

The unit I am creating has activities for students to develop a deeper understanding of simple and compound machines.
I really find that students love the rotational activity work that I have included and as you know I love my students to have hands on practical activities, while following scientific process and being encouraged to think for themselves.

This will be a very comprehensive unit with powerpoints, worksheets and the like so it can't be rushed. In the meantime have a look at Edheads. There are some other activities listed there also for older students such as the virtual knee replacement - looks like fun!

Monday 13 May 2013

Worksheets to complete the unit on plants for year 1 and 2 students.

It has been really nice to see people have been downloading the Learn to teach science well guide that I wrote. I would love some feedback on how people have found it. I have just finished uploading the worksheets that accompany the unit described in the guide. They are available at TpT.


When I was teaching this unit with a year 1 class I really enjoyed the detail my young students went to in not only examining the plants before they drew their observations, but the detail in their images. I had to teach my students to draw what they saw not what they thought was there and in doing so they really noticed more from week to week. They seemed to care about the plants more as they monitored their growth and looked at every detail of the plant pots that were being passed around the class. 
I was impressed with how well they understood the concept of fair testing and I knew that I could trust them to be gentle with the plants as they were passed around the room so as to not create any accidental variables. 
It was one of those great units you just know your students will remember for a long time and that's what we aim for. 

Now that I am creating a few resources I am noticing challenges with access to free images, borders and fonts that I am legally allowed to use on my resources. I am not at the stage of being able to purchase access to stock images, but I realise this may be an option for me in the future. Any other suggestions are welcome.

So where to next. I feel that it would be only right to spend some time working on lessons for the design and make process the way I like to do it.

Friday 10 May 2013

But hey, what about that other side of science; Design and Make.


While reading over my posts and other things I have put together today, I realised I have barely touched on another side of teaching science and technology that is the Design and Make process.
This can be a very intimidating process for teachers to undertake with their students, not only because they feel that the sourcing and organisation of resources can be a major pain, but also that design and make tasks can be messy.

Well we can't do much about the mess except reinforce with our students that if they don't clean up after themselves they won't be able to do the work. Ensuring we leave enough time in a lesson to clean up and develop a clean up routine such as allocating two students to only focus on cleaning up one particular thing. They touch nothing else and if you allocate enough of those pairs of students, pretty soon your class will be cleaner than before you began.

Now for resources; When I began teaching science in my classroom I soon realised that I was going to need a lot of resources. As I was often teaching the same lessons to a whole stage I needed 120 of something at a time. So I had to collect, use things that were free and change my thinking. What was rubbish to me and my parent community could be a perfect design and make resource for my students.
So what did I collect:
«  take away food containers - great for storing students bits and pieces while a work is in progress. Great for mixed paint too.
«  bread bag tags 
«  plastic and metal bottle lids - milk bottle, glue lids, beer bottle tops,
«  snap lock bags
«  elastic bands
«  corks
«  paper clips
«  bread bags
«  paper towel rolls and toilet rolls (if your school allows)
«  dry pasta
«  used cds
«  used wrapping paper and scraps of material
«  ribbons
«  cardboard tubes that are on dry cleaners hangers
«  tissue and match boxes
«  paddle pop sticks and balloons
«  fruit netting bags
Your parent community may also work in places where there are offcuts or items that are regularly thrown away, but could be used by your students. Ask as you will never know what you will receive.
My general rule of thumb when collecting resources was; just because I can't imagine what the kids will do with it, doesn't mean it isn't useful.
Don't limit your students to your imagination and have fun with them. Often my lesson would consist of me sitting with a stanley knife cutting pipes, bending wires or cutting foam into the shapes my students wanted so they could turn them into fantastic new objects.
Lastly a word for the neat freak teachers out there; let go and enjoy your students using their creativity in a new way.

Jenni


Thursday 9 May 2013

Powerpoint presentation to match the Learning to teach science well guide.

I have just uploaded the powerpoint presentation 'Parts of a plant and their function' to match the unit outlined in the Learn to teach science well guide. 

This is an 8 slide presentation that goes through the parts of a plant and explains how each part works. I also talk about why bees and birds like plants too. 

It's suitable for year 1 and 2.


It's available from http://www.teacherspayteachers.com/Store/Sciencetoteach for just $1.

Next I'll be working on the worksheets to accompany the unit.

I would like to create some presentations from Prezi soon as I think it is a fantastic alternative to powerpoint and best of all any teacher with an @education email address can register for free and so can your kids. There is no best way to describe a Prezi presentation. It's just something you need to see. Watch this space.

Jenni

Science lessons should elicit wonderment and creativity in the minds of our students.
I'm very excited!!

My first free document is up and available for download by all of you that want to improve your science teaching. It has taken me all week to write, review and write, but it's ready.


Learning to teach science well is an 8 page description with a unit plan interwoven as an example of how to implement an effective scientific investigation. 

In the document I describe in detail the process of investigating scientifically and break down the parts of the process. I also decipher some of the jargon and explain exactly how I teach tricky concepts to young children.

This plan is not just for teachers of year 1 and 2 though. The process remains unchanged through to university and so the concepts are equally as adaptable to year 5 and 6. In fact with great continued teaching year 5 and 6 should be running the process independently. 


The unit plan is suitable for year 1 and 2 and tests the question; Is a plant more in need of water, sunlight or nutrients? So if nothing else by downloading it you get a near complete unit plan. Not fully complete because the accompanying powerpoint and worksheets aren't attached, but hey who doesn't like a freebie.


It is available for free download at teachers pay teachers and teacher marketplace. More places to come.

http://www.teacherspayteachers.com/Product/Teaching-elementary-science-well-a-how-to-guide

http://www.teachersmarketplace.com.au/browse/resource/?cid=4483&searchstring=sortby%3Ddate_desc

I have really enjoyed writing this and it has shown me how much I have tucked away in my brain just waiting to come out and be shared with you all.

I would love to know what you think. 

Happy science teaching.
Jenni

Monday 6 May 2013

Starting with the basics; the processes we must follow.

For years of teaching elementary/primary school aged students, I struggled with how to create the best plans for students to best apply the investigating scientifically and design and make processes in my lessons.
Of course we have to start with the basics of what the two processes look like, then get into the nitty gritty of how to implement them in a classroom.

The process of Investigating Scientifically is as follows;


In part from the NSW Department of Education and Training 2005


This is the basis from which all science invesigations should be developed. Of course the level of complexity to which you teach it will be based on your grade level. For example I wouldn't teach a kindergarten student to write a hypothesis, but I certainly would ask them to make predictions and try to justify those to me. Any way we can encourage our students to think independently is great training for them.

When teaching science practically we are generally either teaching students to investigate scientifically or to design and make. 

The Design And Make process is as follows. 


This really gives students an opportunity to let their creative juices flow. Even from kindergarten they can be learning to identify an issue, create solutions for it, evaluate those solutions then make changes to their original ideas.

In the coming blogs I will be discussing how to create proformas for students to use in their science work when completing these processes and take a closer look at the meat and bones of a scientific investigation. We will look at 'fair testing', writing hypothesis and predictions and how students can collect information from which to base their results.


Learning to teach science well

Day one of kindergarten science class and I ask my students what they believe science is? 
Every year the response was the same; 'We will blow things up and make potions'. 
The image kids have in their mind seems to have come in part from tv, movies and books, but some kids really love science and read about it with their parents or do experiments on the weekend. They understand that there is so much more to science and that it is such a vastly wide subject. There is bound to be a theme they are enthused about although it may not mean they like every science lesson. 
Either way, they are usually keen. Bright eyed and eager to know; 'What will we be learning about this term?'


I have seen many young students enthusiastic for their school science education, only to become disillusioned and unenthralled by the lessons delivered. Bored with worksheets, fact sheets on inventors and videos, they wanted to get their hands dirty, make something fly or test something. They wanted to create, to work in groups, and 'do stuff' but mostly to not have to sit and write or be talked to. Of course, most units of work have some element of this, but for some this is all they experience. 
I believe that for some elementary school teachers, teaching science can seem intimidating. It requires the teacher to not only teach in a different way, to use and organise a lot of resources, but for the teacher to let go of the control of a highly structured class and accept some temporary mess and let their students move around.


Once I was able to overcome this, I found teaching science fun and of course the students enjoyed it more. I learned to expect the unexpected from them and let their imaginations and creativity run wild.


Thursday 2 May 2013

The beginning of an exciting adventure in science education.

Welcome!!! Today we embark on an exciting adventure. 

For years I have taught primary school science to enthusiastic open young minds, shared in student's successes and challenges and watched them engage in their lessons with creativity and zest. It's time to share with a wider audience the lessons I have taught and been taught by my students. 

I have seen science taught in schools where the staff have not been supported in their endeavour to improve science education and where there are limited teaching resources. I have met students who love science but their science experience revolved around worksheets and limited practical activities. I have scoured the web trying to find appropriate resources to teach the way I wanted to teach, often coming up short and having to create my own. 
What you will find here are teaching ideas, methodology, activities and processes that I hope will assist teachers to improve their science education. We have been told many a time that the students we teach now will work in jobs not yet created or thought of and I believe fostering creativity in science education will not only help those jobs to be created but enable students to become the creative workforce that drives development. 

I look forward immensely to conversing with the teaching profession about the teaching of science in primary/elementary schools not only in Australia, but internationally. I hope you find something of use in this blog. 


Jenni Bennett


Science lessons should elicit wonderment and creativity in the minds of our students.